Each week your group will complete a new poster that compares and analyzes the week’s materials. These posters should be collaborative and creative. They might even be fun (at least I think so, but then, I’m a historian, so I’m usually not a trusted authority on what counts as fun).
Every week I’ll provide your group with a template to work from (I’ll explain these in greater detail below). These templates will guide your interpretations of the readings; nonetheless, these posters are your learning space, and therefore you are welcome to change or overwrite the template as you wish. The only rule is that you treat your classmates and their ideas and contributions with respect.
I fully expect that your poster may become a visual disaster as you produce it. That is entirely okay. Deep critical thinking is often a messy process and our goal here is to think and brainstorm, not necessarily to produce a pretty image.
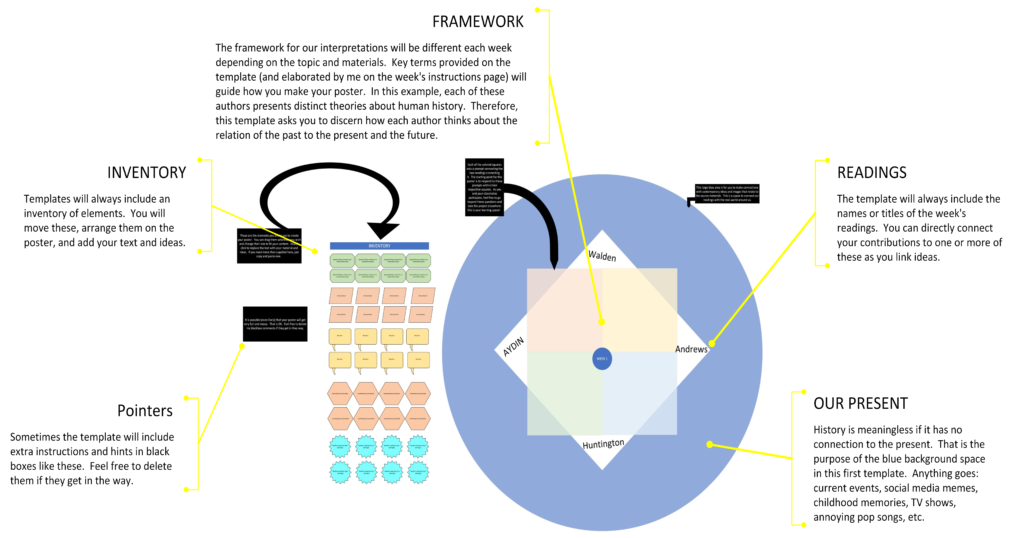
OK, let’s look at the template:
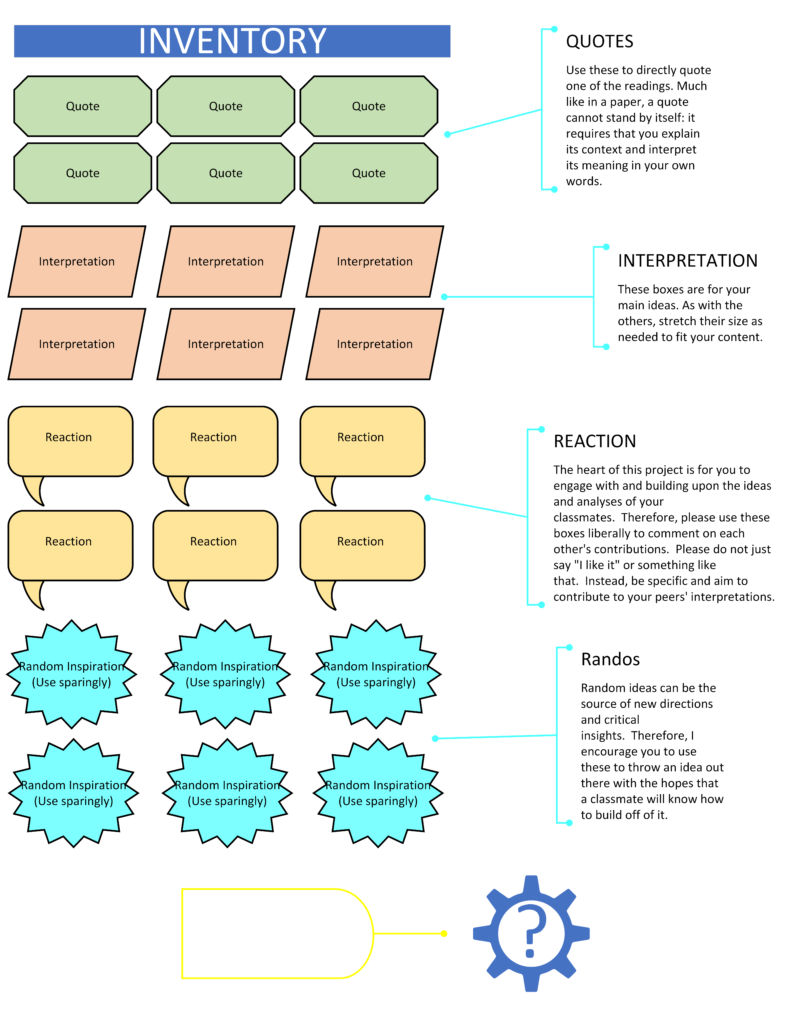
Let’s take a closer look at the Inventory
The elements in the inventory will vary slightly week to week. Just copy an element if you need more of them. Double click the text to replace it with your own content.
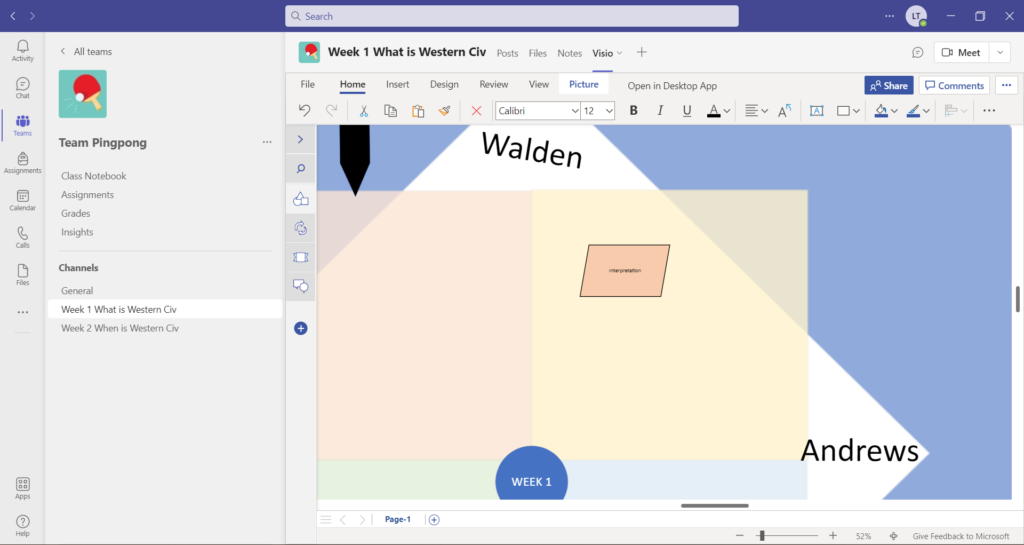
To add to the poster, you just click on one of the elements in the inventory, drag it over to where you want it, and then insert your text. You can resize it as necessary to fit your content.
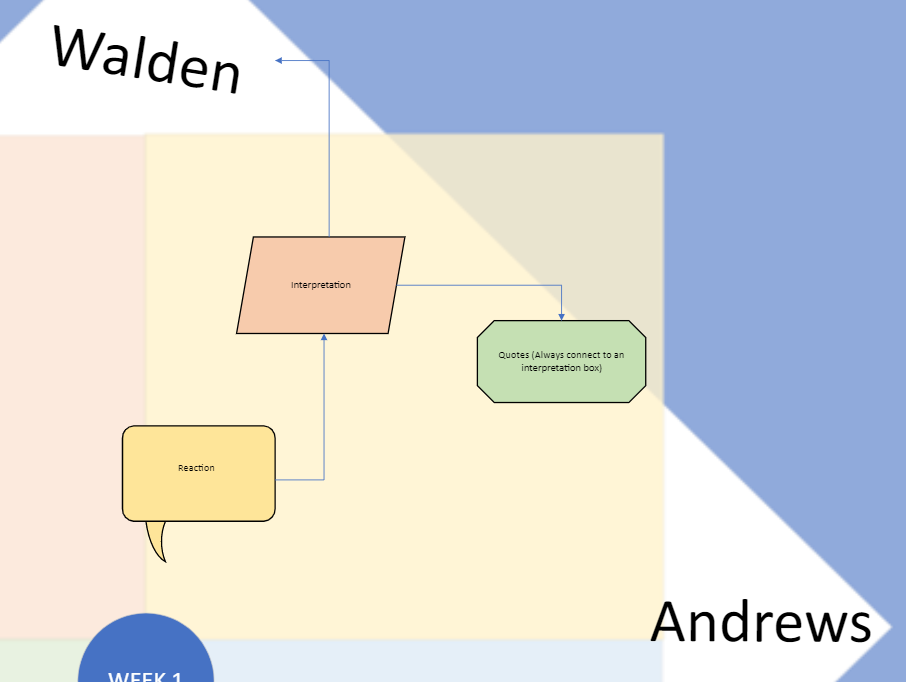
As you and your teammates add more material, you can link certain elements together by clicking the little circles around them.
Throughout the course, I also encourage you to play with the other shapes that this app has to find new ways to illustrate the connections between ideas and interpretations.